iz um par de diamantes tufados cabeceiras agora ( Joanna foi apenas minha segunda embora) e eu sinto que tenho um bom senso de a abordagem mais fácil DIY agora. Por outro tutorial cabeceira tufos eu fiz, confira este post . Eu diria que qualquer trabalho que envolva estofos tufting é uma espécie de DIY avançado, mas esse projeto é definitivamente factível (talvez até mesmo divertido?).
Longe vão os dias em que passam horas mapear e fazer furos na madeira! Eu tenho usado pegboard e é perfeito para esses projetos de cabeceira. Barato, leve e resistente o suficiente. Você vai ser pendurado o pegboard na parede por isso é bom que o conselho não é completamente rígida.
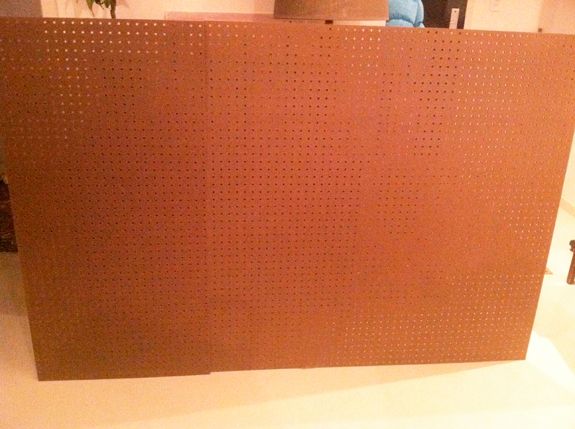
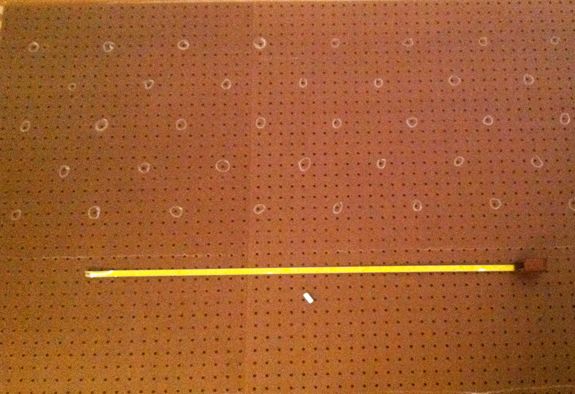
Eu tinha Home Depot cortar a placa para mim, por isso era apenas o tamanho certo para Alex e cama de Joanna rainha. Os buracos na pegboard são 1 "distante. Você precisa fazer um pouco de matemática e mapear para descobrir colocações de botão, mas quando você tem a fórmula para baixo, é apenas uma questão de contá-lo para fora e marcar os buracos com giz.
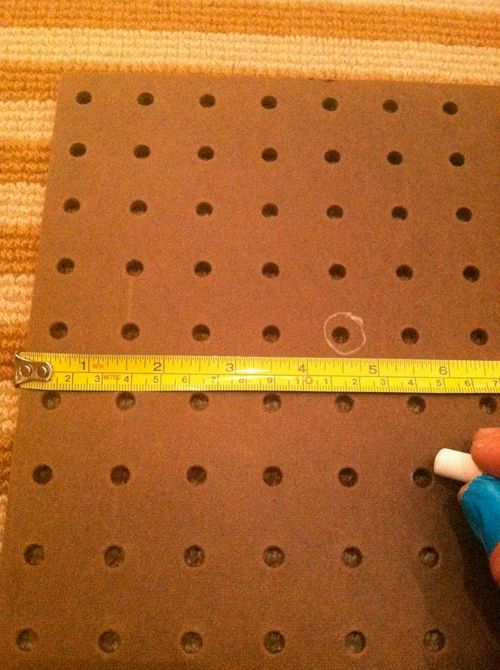
Eu tinha três fileiras de nove botões e duas linhas de oito para um total de 45 tufos. (!) Eu queria um monte de tufos, porém, assim que você poderia fazer menos. Eu acho que é uma boa idéia de olhar para imagens inspiração primeira e contar os botões que cabeceira e estimar o espaçamento que você precisa para o olhar que você está depois.
Eu comprei a minha 3 "espuma de estofados em Joann com um 50% de desconto cupom. Eu definitivamente recomendo usar exatamente 3" espuma para este projeto. Caso contrário, a cabeceira vai olhar fino e barato. Uma nota importante - você só precisa de espuma suficiente para cobrir os dois primeiros de thrids ou mais de seus pegboard. Minha espuma foi de 24 "de altura e meu pegboard foi de 40". A parte inferior sem a espuma vai atrás da cama.
Então, para marcar a sua espuma, coloque o pegboard baixo perfeitamente em cima da espuma e usar marcas do seu registro e um Sharpie.
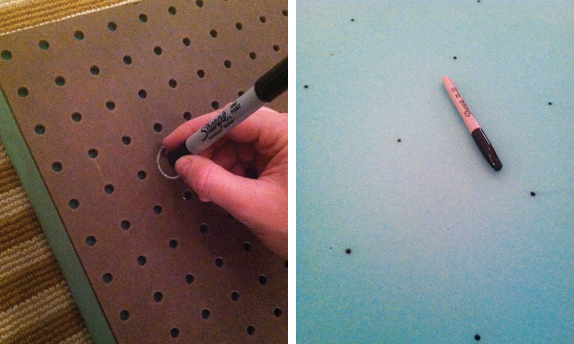
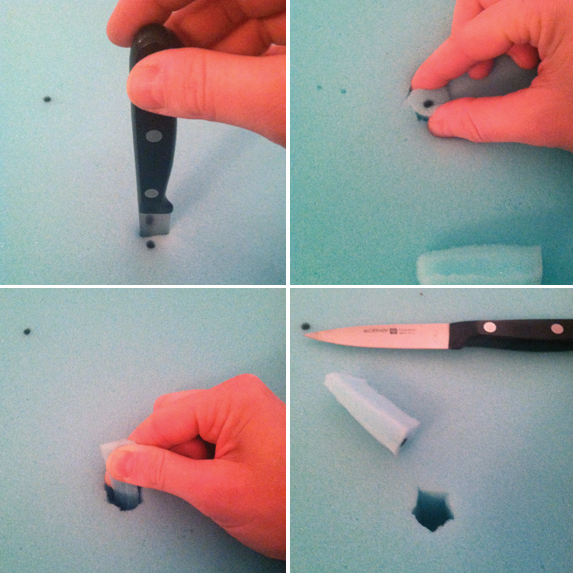
Um dos segredos de obter tufos profundas é remover a espuma de onde os botões ir. Meu método é muito manco - Eu só usar uma faca para cortar um buraco em torno das marcas de registro. Você acabou de pegar o pedaço de espuma, torcer e puxar.
Você vai voar por esta etapa. É um divertido e fácil.
Veja como a espuma só cobre a parte superior de dois terços ou mais do pegboard?

Assegurar a espuma para o pegboard usando adesivo de pulverização.

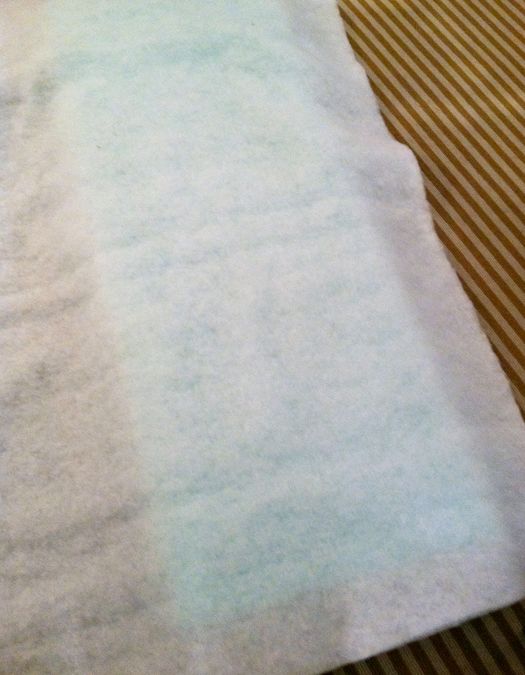
E deitou-se uma folha de sotão de alta rebatidas no topo de sua espuma. O tecido passa por cima da batedura.
** EDIT: Uma nota rápida sobre o tecido. Eu usei dois metros de tecido de cor sólida para este projeto. Se você quiser usar um padrão (o que eu realmente não recomendo para inserir tufos, a menos que a escala é super pequeno), você terá que juntar dois ou três painéis do tecido para que a peça é larga o suficiente e de modo que o padrão corresponde e executa o caminho certo. Melhor ainda, é só usar um sólido tecido :) Você pode executar o tecido na horizontal (chamado railroading) e é só pegar dois metros e chamá-lo bom.
PS Você realmente só precisa de dois metros de uma cabeceira queen size. Eu estava preocupado que os tufos iria ocupar lotes de tecido extra. Nem um pouco. Talvez um extra total de dois centímetros foram necessários para a cabeceira da cama todo.
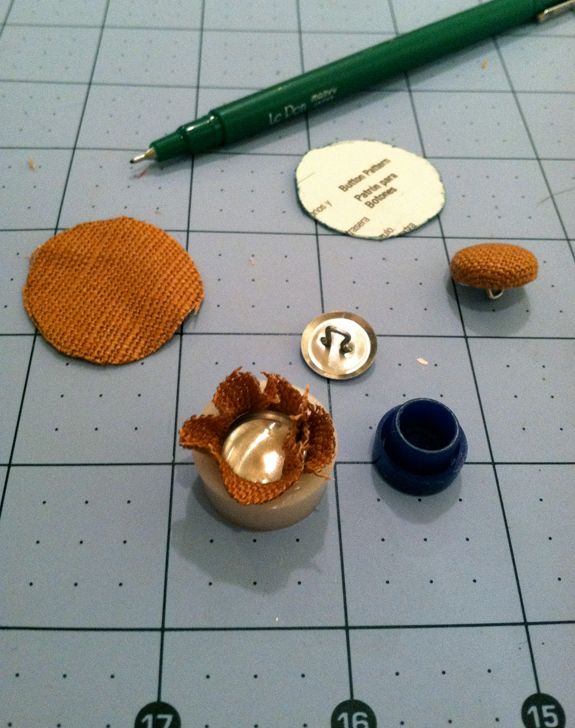
Aqui está a parte onde você vai precisar de muitos botões. Você pode comprar botão fazer kits e refis por apenas alguns dólares (eu usei a 5/8 tamanho "). Ele faz demorar algum tempo para fazer todos os botões, porém, assim que este seria um bom lugar para contar com a ajuda de um amigo e fazê-lo estilo de montagem.
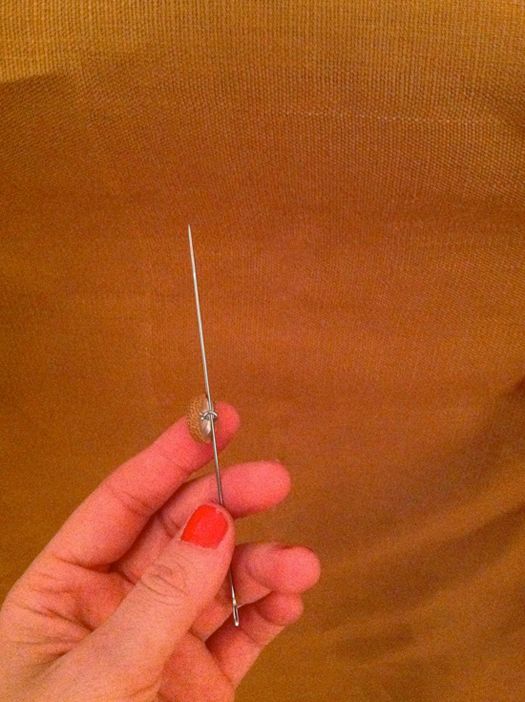
Usando uma agulha longa e estofos dobrou fio grau estofos (NÃO o material para todos os fins! Esta discussão é mais parecido com fio), nó triplo o botão, e encontrar o seu buraco primeiro botão.
A partir da frente da cabeceira, empurre a agulha através do tecido, espuma de rebatidas buraco, e buraco pegboard, todo o caminho da volta.
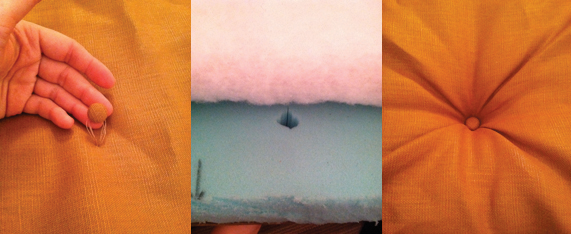
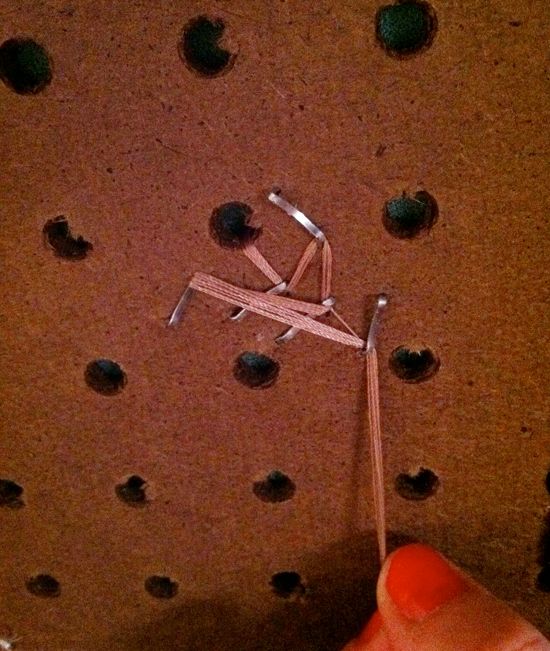
Puxar para fora e para baixo tão apertado que puder, coloque um grampo na pegboard sobre a lista de discussão. Mas ainda assim manter a puxar esse fio para manter a tensão. Coloque em um monte de grampos com o fio que está sendo puxado em direções diferentes para garantir que o botão de tão profundo como ele pode sentar-se.
E o seu tufo primeiro é feito! Você sempre quer começar no centro e trabalhar seu caminho para fora horizontalmente.

Certifique-se de deixar as bordas para o último. Eu achei foi me levando cerca de uma hora por linha no começo. No final eu tinha até 20 minutos por linha. Honestamente, meus dedos estavam absolutamente pulsando neste momento! Eu quebrei esta cabeceira para fora em uma noite e teria sido melhor para dividir a parte adornar em duas noites, apenas para dar os meus dedos um descanso :)
Como qualquer projeto de estofos, há algo a ser dito para manter uma mão macia e tipo de artfully brincar com o tecido. Especialmente quando decidir onde colocar o botão na tela e na obtenção do tecido para dobrar à direita. Jogue com o tecido e vai trabalhar com você. É absolutamente implorando para se sentar em uma forma de diamante, se você ajudá-lo ao longo de um pouco. :)
Uma vez que todos tufting é feito, você só precisa terminar as bordas. Não basta rolar a tela para trás do pegboard e grampeá-lo para baixo. A chave para o bom projectos de estofos que procuram é tudo nas linhas. Minimizar os solavancos e rugas! O tecido, especialmente ao longo das bordas deve ser plana e lisa. Para fazer as bordas de uma cabeceira lisa, dobra em uma linha que vai para fora de cada tufo para o perímetro. A prega cuida de todo o tecido em excesso de modo que as arestas podem ser liso e esticado e pronto para ser grampos para baixo no lado de trás.
Para terminar a parte inferior da cabeceira da cama, onde a espuma termina, basta apertar sua arma grampear até sob a espuma um pouco e executar uma linha de grampos na parte inferior da frente todo. Em seguida, puxe o tecido para baixo ao longo da borda inferior do pegboard exposto, ordenadamente vezes para trás e para trás do grampo, como você fez com as outras três bordas da cabeceira do leito. E é isso!
Nós ferrou três anéis D na parte de trás e usou um par de parafusos cão parede na parede para montar o cabeceira.
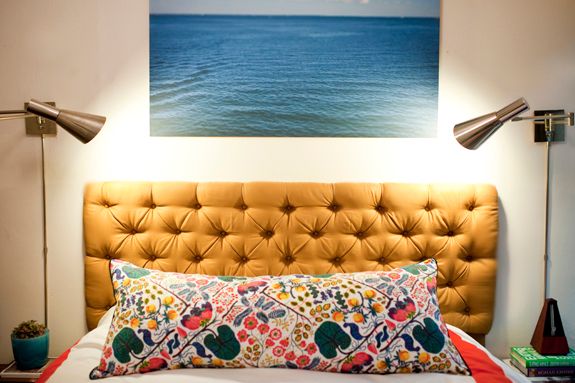
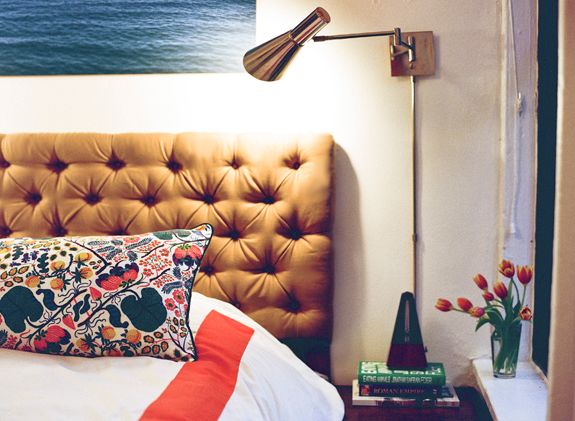
Você pode ver nesta foto como a espuma só começa acima do colchão. Desta forma, o tipo de colchão senta na cabeceira da cama.
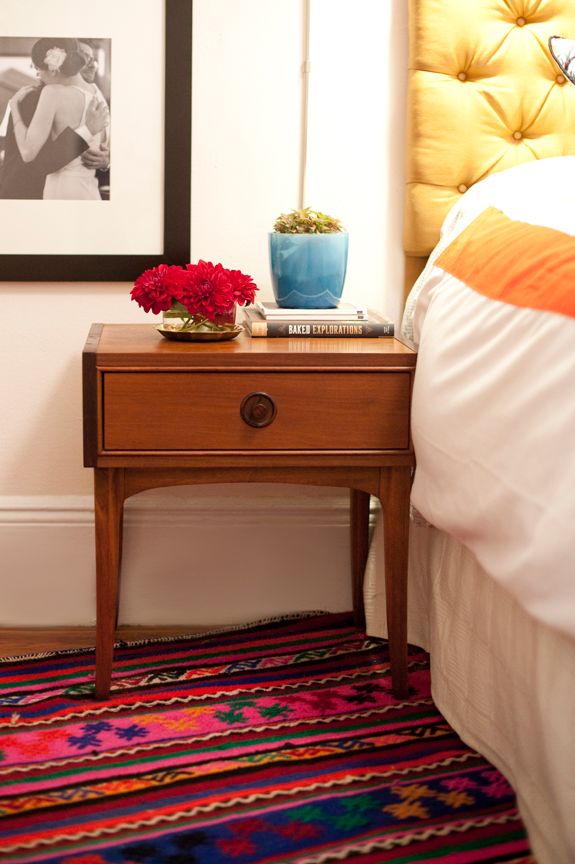
PS A roupa de camelo é de linho Gray Line , a partir de sua linha Warsa (apenas US $ 9 um metro e vem em todas as cores sob o arco-íris).
Você pode também gosta:
Este DIY é patrocinado pela Home Depot . Estou tão orgulhosa de estar trabalhando com eles sobre esta série de conteúdo onde estou reinventando móveis antigos e dando-lhe uma nova vida. Eu realmente acredito que a melhor maneira de obter móveis de alta qualidade a um preço mais baixo é comprar peças vintage e redirecionar-los. Home Depot é dedicado a ser eco-friendly e acho que este tipo de reciclagem é um grande passo na direção certa.Obrigado, Home Depot!
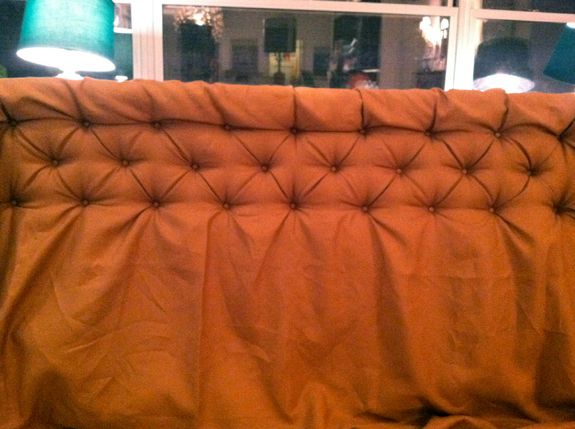
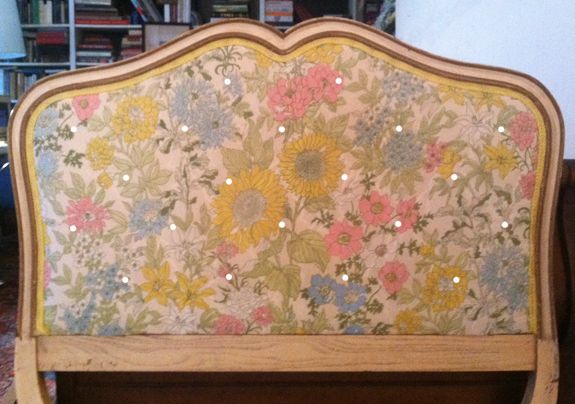
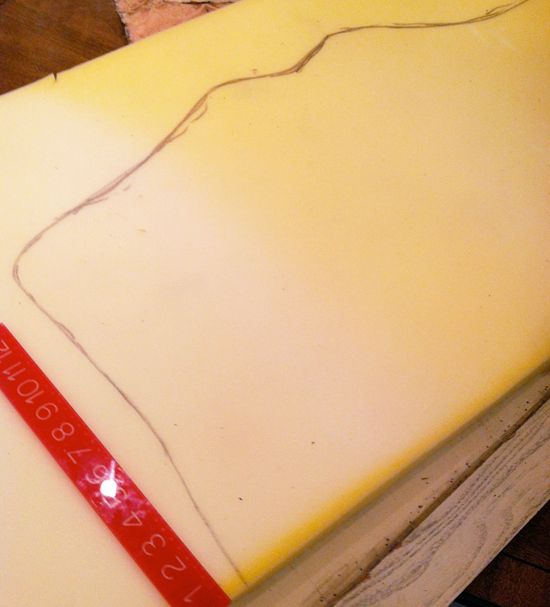
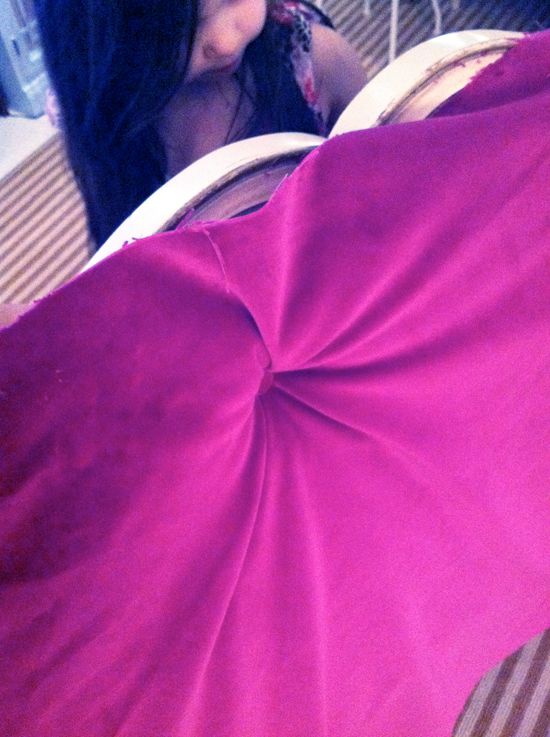
eu realmente queria um par de cabeceiras tufados para salas de minhas meninas, mas as peças adornadas pode ser especialmente caro! Peguei um par dessas cabeceiras vintage para a próxima nada em uma loja de thrift e pensei que provavelmente poderia chegar a uma maneira de reutilizar estes em vez de comprar algo novo. eu tirei uma foto rápida e, em seguida, brinquei no photoshop com a colocação dos tufos. Uma vez que há um monte de curvas nesta peça não era apenas uma questão de fazer alguma matemática, como com a maioria dos projetos tufting que eu fiz.
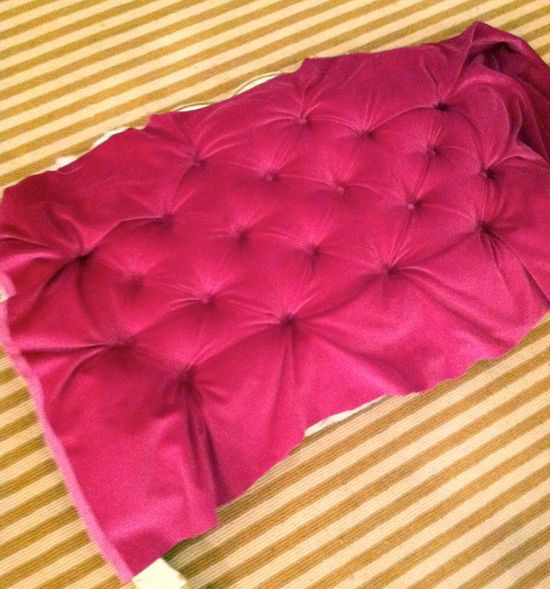
Uma vez eu tive a colocação inserir tufos para baixo, eu comecei a retirar o estofamento de idade.
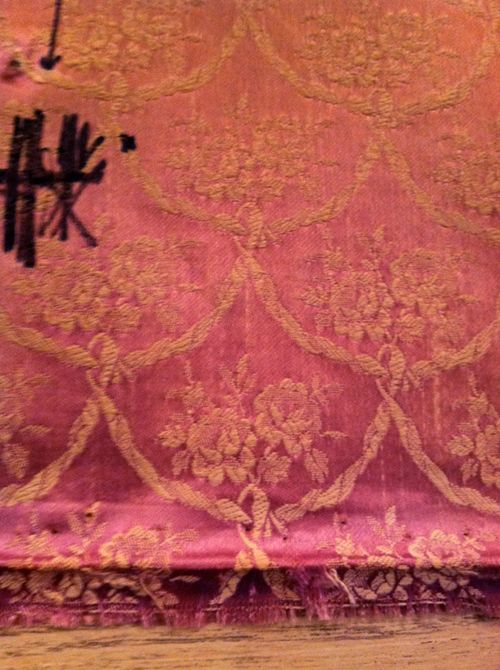
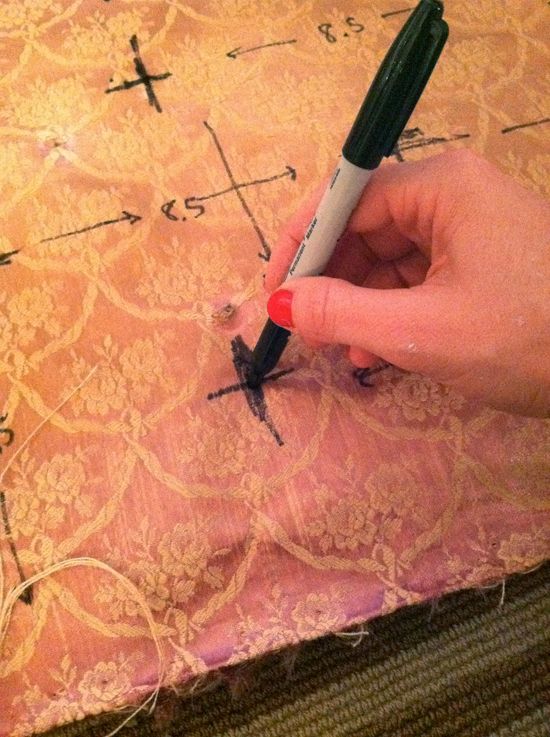
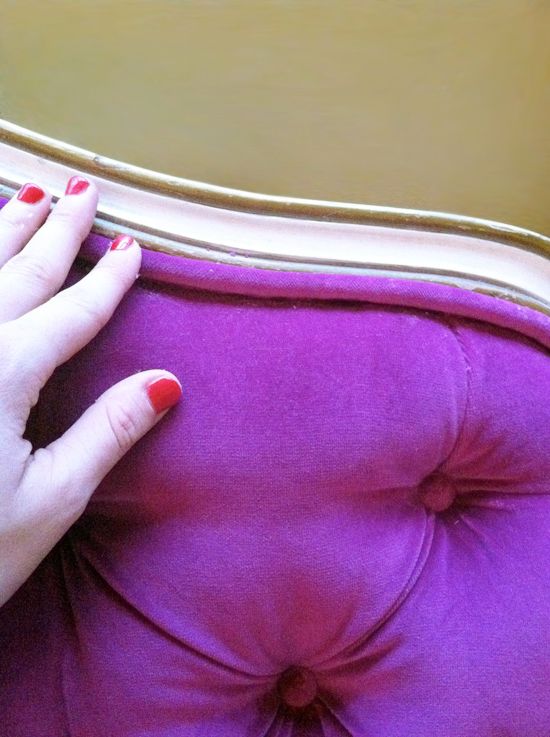
Debaixo da camada superior era um pedaço realllllly velho de seda que estava super sunbleached. Eu adoro separando upholstery velho para ver o que os tecidos estão se escondendo.
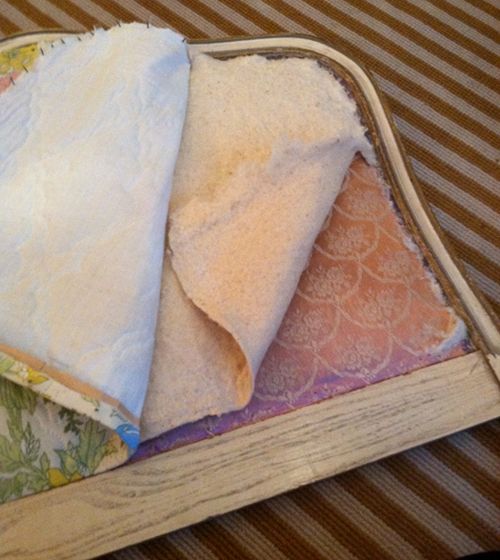
A parte que não tinha desbotado era um lilás lindo. Jogado à minha ombre obsessão :)
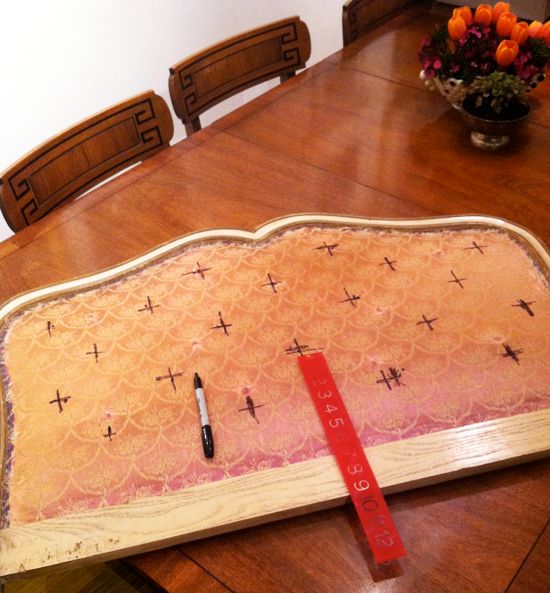
Eu usei esse tecido por baixo para marcar a minha concepção inserir tufos. A idéia básica é manter tudo em linhas retas e, em seguida, compensar as linhas, como a colocação de tijolos ou de desenho polkadots. As linhas vão alinhar na diagonal e horizontalmente.
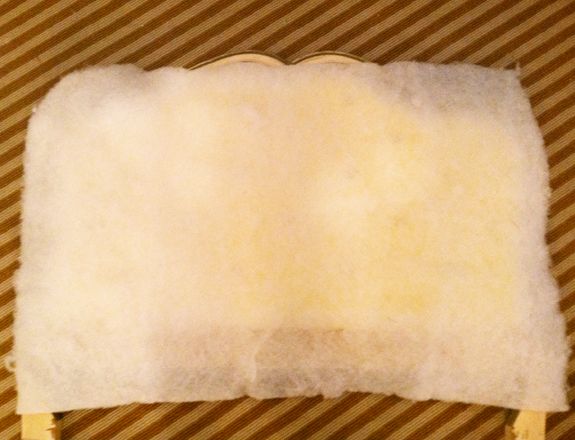
Então tirei a camada inferior de tecido e batting de modo que tudo o que restava era a moldura de madeira.
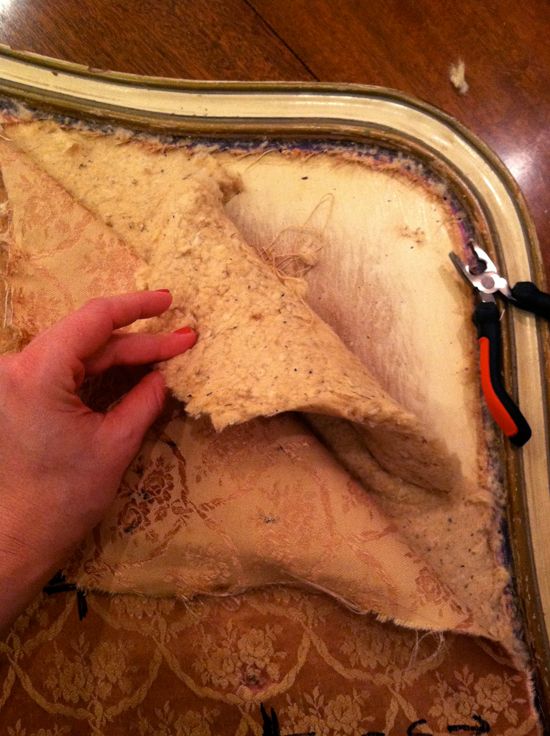
Então tirei a camada inferior de tecido e batting de modo que tudo o que restava era a moldura de madeira.
Eu usei alguns dos rebatedores para marcar a forma do meu espuma. Eu usei o batting em vez do tecido, porque eu precisava de espuma a ser cortado um pouco curto por isso seria muito longe inserção do frame da cama.
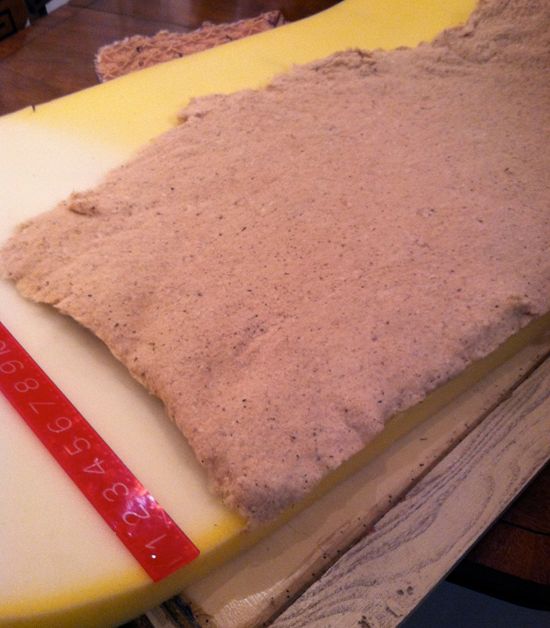
A espuma que usei aqui foi adaptar também. Eu usei uma espuma camping! É como uma maneira barata para comprar 2 "ou 3" de espuma.
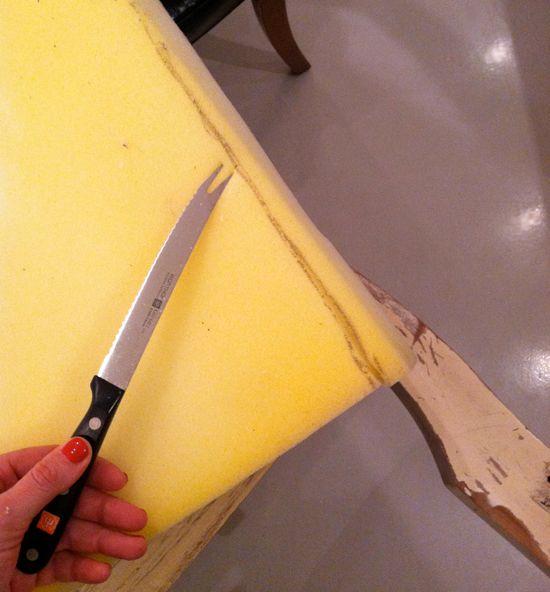
Eu usei uma faca serrilhada para cortar a forma, mas eu gostaria de ter uma faca elétrica.Aqueles que trabalham tão bem para o corte de espuma.
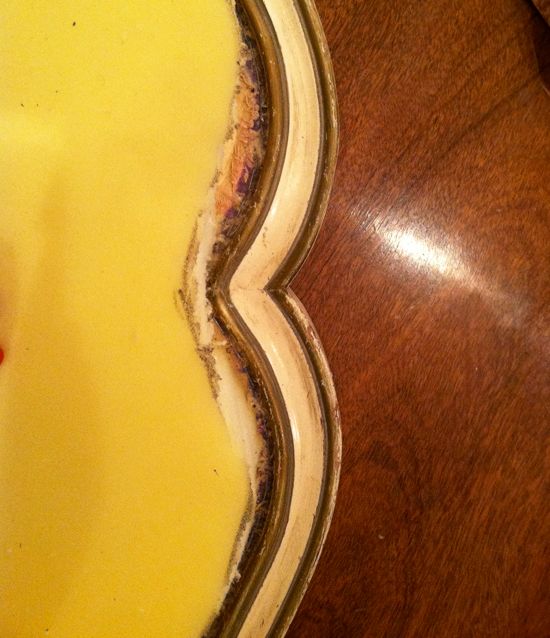
A espuma se encaixam perfeitamente dentro do quadro, exatamente onde eu queria, cerca de um centímetro dentro
I utilizada uma combinação de a faca serrilhada e um par de tesouras para barbear para baixo nos cantos da espuma em cerca de um ângulo de 45 graus.

Eu cortei alguns pequenos furos no meu guia de tecido para que eu pudesse tirar algumas marcas de registro na armação.
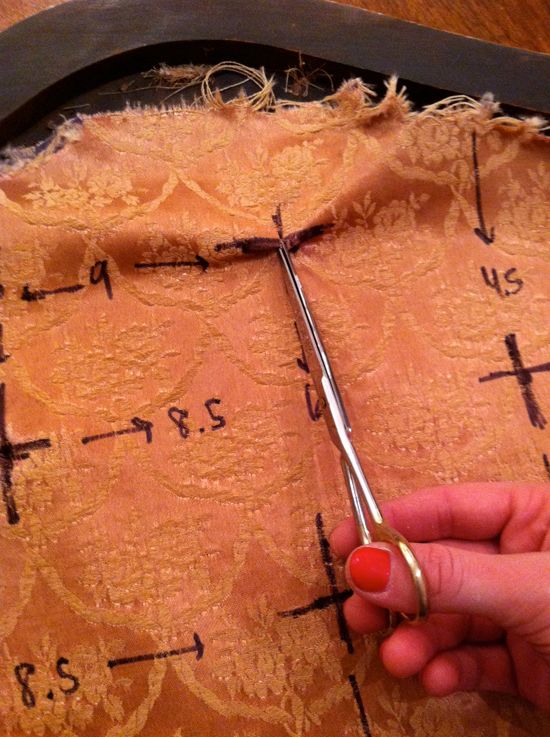
Eu tinha anotado todas as medidas no guia de tecido também, então era fácil para rapidamente checar minhas marcas.

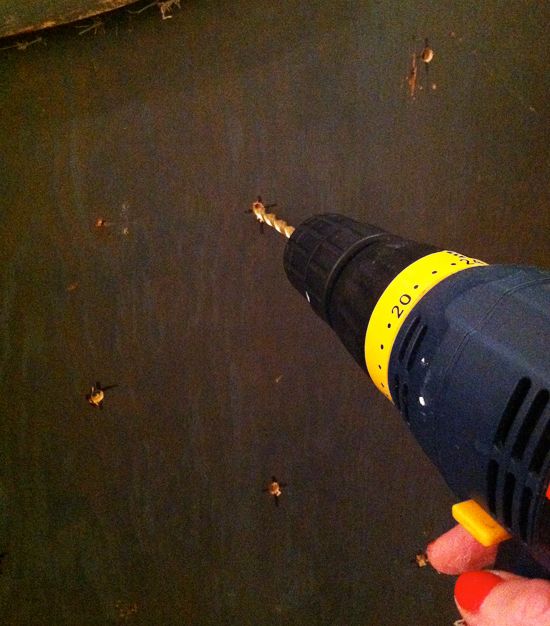
Eu perfurou o quadro com uma broca de 1/4 ". É uma boa idéia de fazer furos muito grandes em seu quadro de apoio para fazer a adornar ir mais rápido.
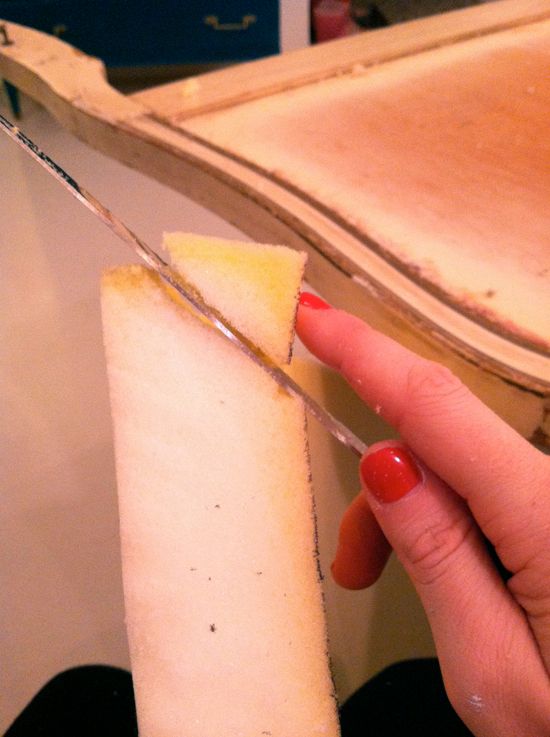
Uma vez que os buracos foram perfurados, eu deitei a armação em cima da espuma e marcado a colocação tufo por picar um sharpie através dos furos. O próximo passo é vital para obter a aparência de profundidade tufo. Você tem que tirar a espuma onde cada botão irá. Eu só uso uma faca pequena poda para cortar um simples buraco em torno da marca de registro. Você quer que o buraco para ser uma espécie de ângulo para que a abertura é mais largo e fundo do buraco tem o tamanho de seus botões.
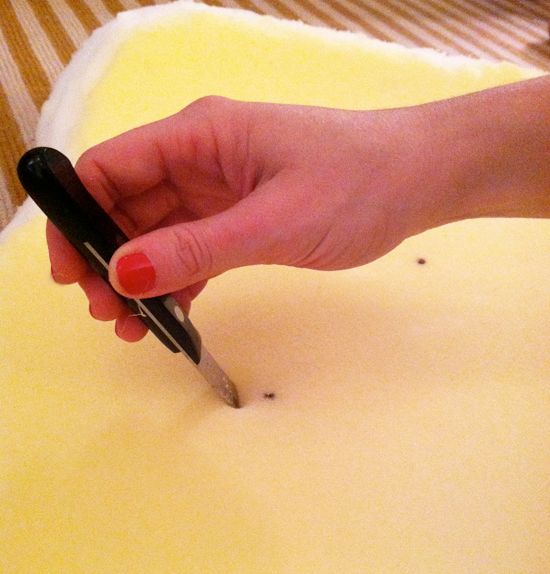
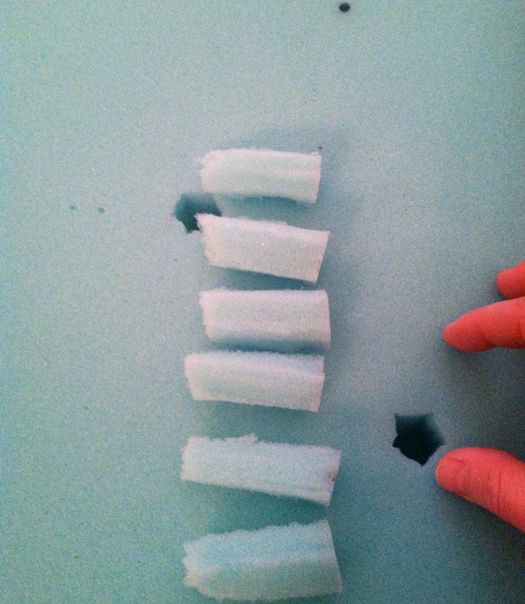
Uma espuma é cortada em um círculo inclinado, você só tem que pegar a peça de corte, puxar, girar e rasgar. Esta parte vai tão depressa!
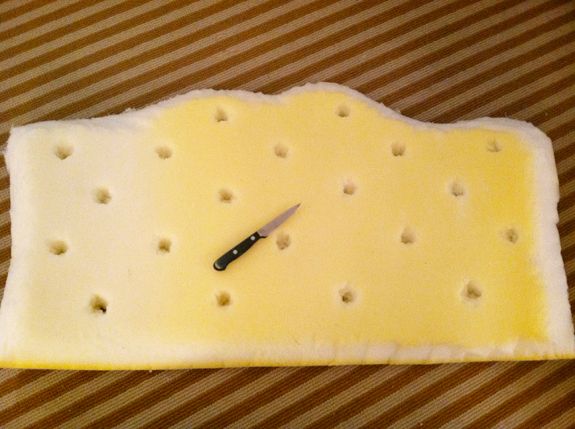
Você pode cortar ou escolher espuma disso, conforme necessário para criar a forma correta para os buracos inserir tufos.
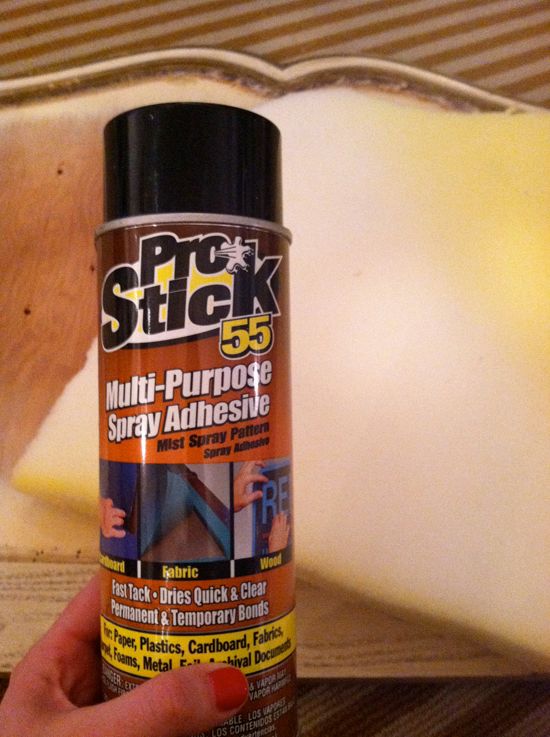
I usado meu fiel lata de cola de pulverização para fixar a parte de trás da espuma para a moldura da cama. Você realmente quer a espuma para ficar parado durante o processo de inserir tufos de modo que este passo é importante.
Cobrir a espuma com uma camada de alta-loft batedura.
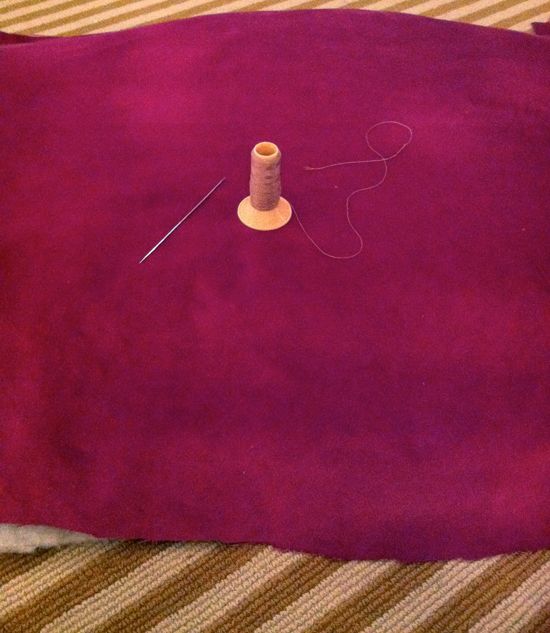
Deite-se o tecido em cima do que e em volta de uma agulha extra longo (o meu é de cerca de 5 ") e alguma linha de estofados (Não use linha regular aqui. Ela precisa ser thread estofos).
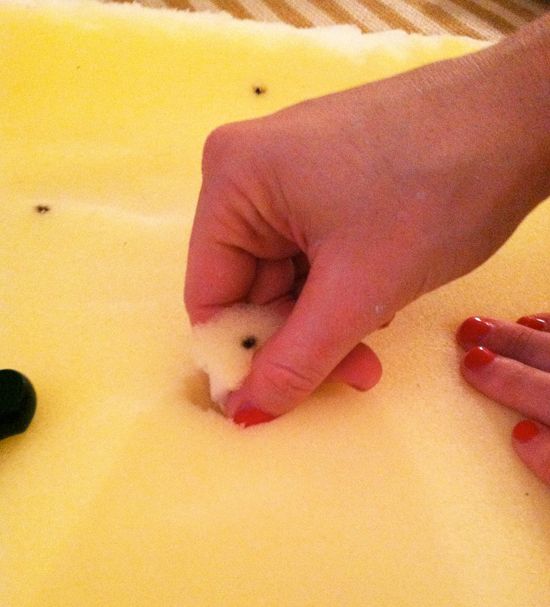
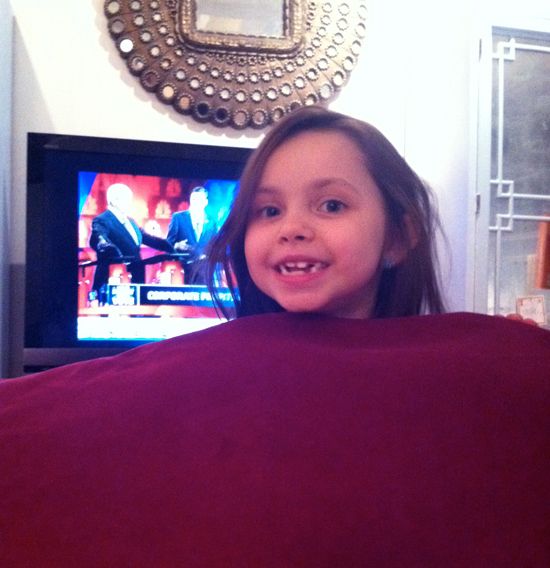
Ligue um show e alistar um ajudante pequeno bonito que está ansioso para empurrar para trás dormir.
Eu saltei explicando o passo sobre como fazer os meus próprios botões, porque há muitas empresas diferentes que fazem kits de botões que cobrem e todos eles têm instruções diferentes. Então, basta pegar um kit e algumas embalagens de recarga e siga as instruções no verso. Eu usei 5/8 "botões aqui. Também eu sempre uso um bocado pouco de cola Magnatac quando faço meus próprios botões, apenas para reforçar a espera, especialmente quando se utiliza tecidos grossos como o veludo.
Ok então aqui está o processo de inserir tufos:
1) duas vezes a sua linha de upholstery e fio de sua agulha longa. Eu uso dois braços de comprimentos de linha de cada vez e eu posso ter dois botões feito com isso. 2) O seu tufo primeiro deve ser o buraco no meio na linha muito superior. 3) Seu agulha deve passar primeiro pelo buraco de volta, através da meio de seu torrão de espuma e, finalmente, que seu rebatidas e tecido.
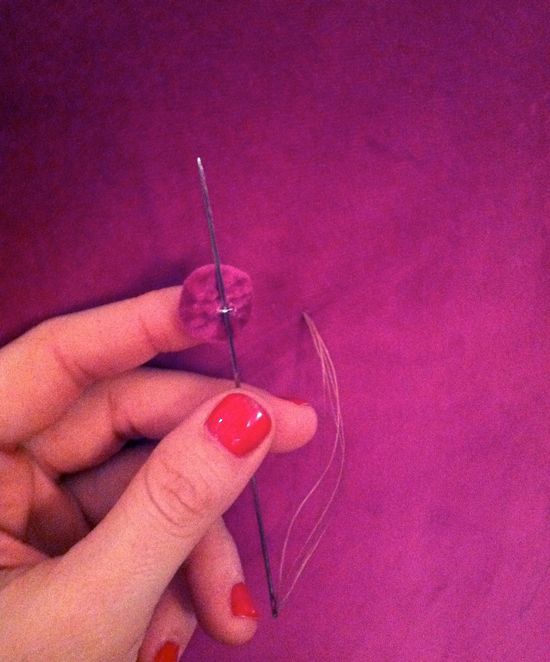
4) Deixe cerca de seis centímetros de fio pendurado nas costas e, em seguida, rosquear o botão na frente. Porque você dobrou seu segmento de estofados, quatro tópicos individuais deve estar em seu botão. 5) Tentar manter todos os seus tópicos arrumado, passe a agulha para trás através da espuma e buraco na estrutura. Pode levar alguns puxões de encontrar o buraco de novo já que você está procurando cegamente, mas fica mais fácil depois de algumas tentativas. 6) Agora aperte o botão e uma espécie de impulso e contorcer-se para dentro do torrão de espuma. Ao mesmo tempo, puxar os fios de trás da armação.
1) duas vezes a sua linha de upholstery e fio de sua agulha longa. Eu uso dois braços de comprimentos de linha de cada vez e eu posso ter dois botões feito com isso. 2) O seu tufo primeiro deve ser o buraco no meio na linha muito superior. 3) Seu agulha deve passar primeiro pelo buraco de volta, através da meio de seu torrão de espuma e, finalmente, que seu rebatidas e tecido.
4) Deixe cerca de seis centímetros de fio pendurado nas costas e, em seguida, rosquear o botão na frente. Porque você dobrou seu segmento de estofados, quatro tópicos individuais deve estar em seu botão. 5) Tentar manter todos os seus tópicos arrumado, passe a agulha para trás através da espuma e buraco na estrutura. Pode levar alguns puxões de encontrar o buraco de novo já que você está procurando cegamente, mas fica mais fácil depois de algumas tentativas. 6) Agora aperte o botão e uma espécie de impulso e contorcer-se para dentro do torrão de espuma. Ao mesmo tempo, puxar os fios de trás da armação.
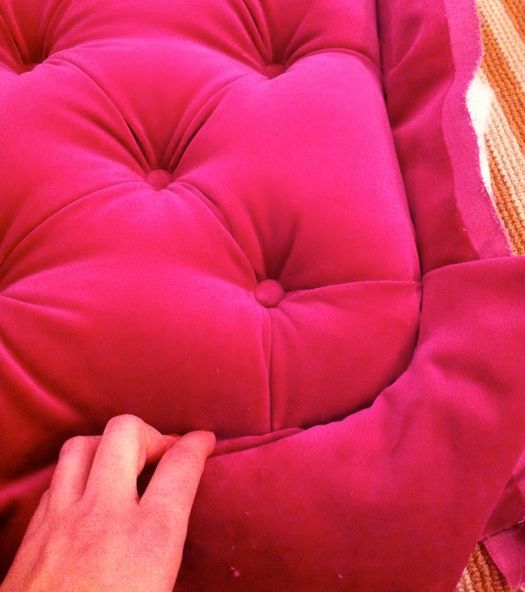
{Em seguida, ficar animado porque que se parece com um verdadeiro tufo legit. Além disso, enviar seus pequenos ajudantes para a cama porque é depois das 8:00. Em seguida, inscrever sua irmã doce em lei, que está na cidade visitando com o marido lindo e novo, para dar uma mãozinha.} 7) Com o seu ajudante apertar o botão com a maior possível, puxar os fios na parte de trás muito apertado e grampeá-las ao quadro. Puxe os fios na direção oposta e grampo na outra vez. Repita algumas vezes e toque no grampos com um martelo para garantir que os grampos estão alinhadas e lá apertado.
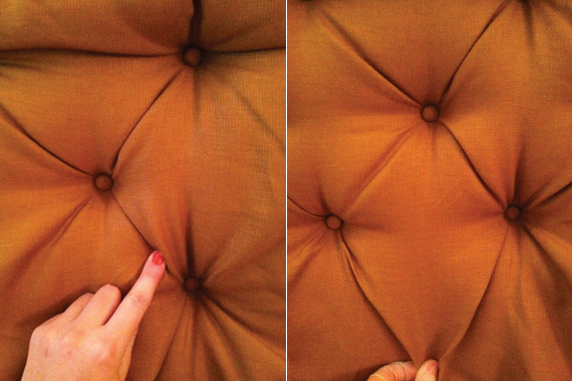
8) Aqui é a coisa mais importante que eu posso compartilhar com vocês aqui: Trabalho em linhas. Comece com o botão do meio e trabalhar seu caminho para fora da linha. Em seguida, inicie a próxima linha no meio de novo e trabalhar o seu caminho para fora. Uma vez que você terminar sua primeira linha e está pronto para começar a próxima linha, jogar com o seu tecido e começar a fazer dobras em forma de diamante. É surpreendente a facilidade com que o tecido naturalmente dobra em forma de diamante. O objectivo é que a superfície do estofos para ser liso e mais apertado possível. Para um olhar profissional, você quer que todo o tecido extra para ir nas dobras.
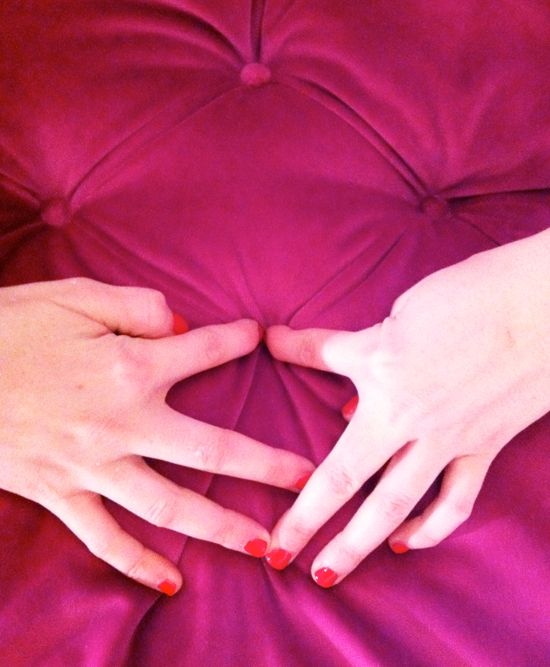
Em vez que colocar o seu tufo onde sua agulha aparece e ter que lidar com as consequências com as dobras posterior, escolha onde seu botão vai fazendo as dobras em primeiro lugar e tipo de empurrar os seus dedos no torrão de espuma. Você saberá exatamente onde colocar a agulha e botão.
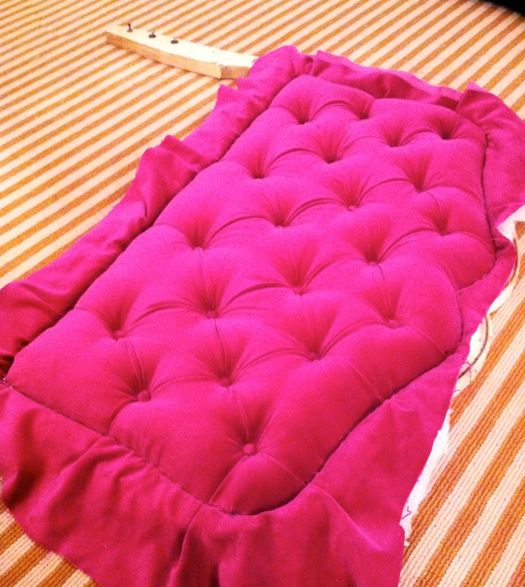
Continue trabalhando fora, indo linha por linha, a partir do centro e trabalhar fora.
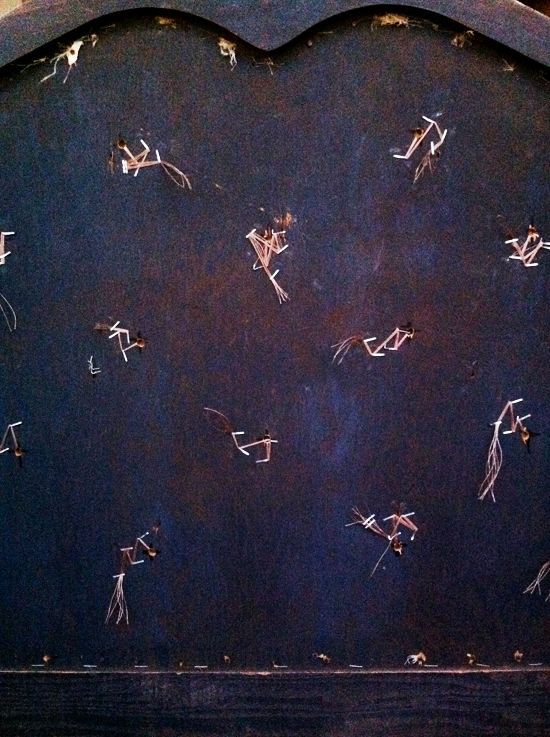
Uma vez que todos os tufos são feitos, parte de trás do seu quadro parecido com este:
Quase lá!
10) Em seguida, aparado todo o tecido extra e rebatidas. Tente chegar o mais perto dos grampos possível.
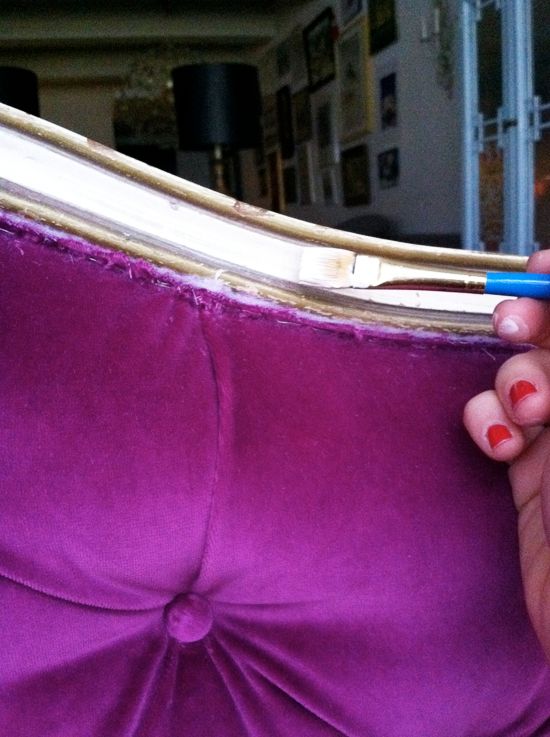
11. Eu decidi que queria tocar levemente o quadro. Eu adoro a aparência de um quadro duro velho com brilhante e limpo estofamento novo! Mas este quadro estava procurando mais sombrio, menos patina-ed, então eu escovado em um pouco de branco vidrado e alguns dos meus favoritos pintura de Ralph Lauren em Ouro Parlor. Só um pouquinho de cada, porém, de modo que o quadro ainda parecia mais velho.
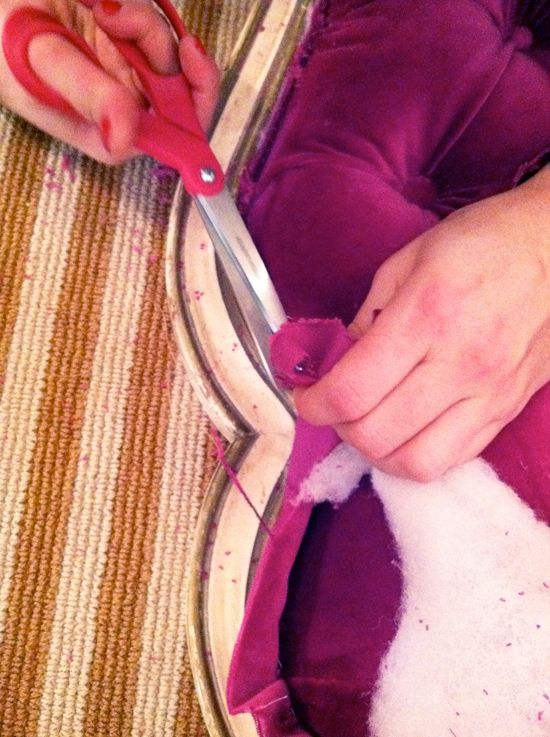
Tudo pronto para o último passo: corte!
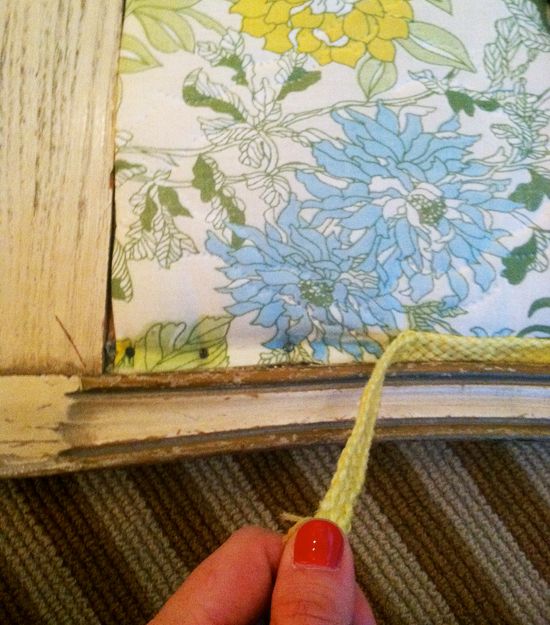
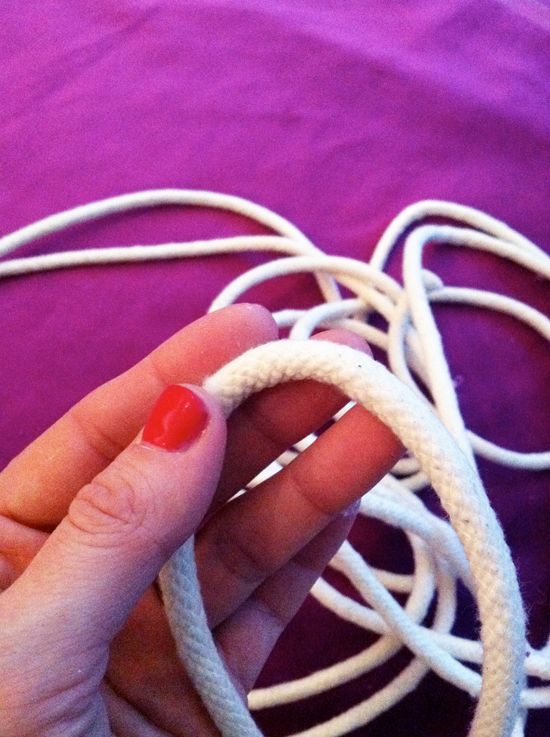
Usei estes passos para fazer correspondência tubulação fora do veludo mesmo. Eu acho que o cordão que usei foi 1/4 ". Nice e grossa por isso preenche a lacuna entre a espuma eo quadro com todos os grampos ea bagunça tecido / rebatidas.
Eu apenas usei minha cola favorito, Magnatac, a cola da tubulação no local. Use uma quantidade generosa, mas tome cuidado para não escorrer. É muito difícil conseguir esta cola fora de veludo especial.
8) Aqui é a coisa mais importante que eu posso compartilhar com vocês aqui: Trabalho em linhas. Comece com o botão do meio e trabalhar seu caminho para fora da linha. Em seguida, inicie a próxima linha no meio de novo e trabalhar o seu caminho para fora. Uma vez que você terminar sua primeira linha e está pronto para começar a próxima linha, jogar com o seu tecido e começar a fazer dobras em forma de diamante. É surpreendente a facilidade com que o tecido naturalmente dobra em forma de diamante. O objectivo é que a superfície do estofos para ser liso e mais apertado possível. Para um olhar profissional, você quer que todo o tecido extra para ir nas dobras.
Continue trabalhando fora, indo linha por linha, a partir do centro e trabalhar fora.
Uma vez que todos os tufos são feitos, parte de trás do seu quadro parecido com este:
9) de grampos em torno do perímetro da cabeceira entre a espuma eo quadro.

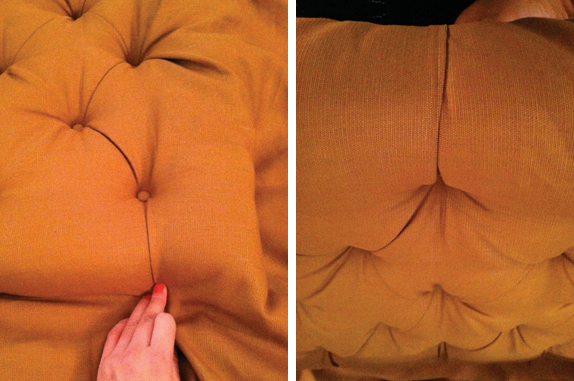
Outra parte importante: Tenha em mente que todas as dobras do interior devem estar na forma diagonal / diamante. Todo o tecido extra em torno do perímetro da cabeceira da cama deve ir para verticais ou horizontais pregas de linha recta. Tente manter tudo firme e lisa.
Outra parte importante: Tenha em mente que todas as dobras do interior devem estar na forma diagonal / diamante. Todo o tecido extra em torno do perímetro da cabeceira da cama deve ir para verticais ou horizontais pregas de linha recta. Tente manter tudo firme e lisa.
Quase lá!
10) Em seguida, aparado todo o tecido extra e rebatidas. Tente chegar o mais perto dos grampos possível.
11. Eu decidi que queria tocar levemente o quadro. Eu adoro a aparência de um quadro duro velho com brilhante e limpo estofamento novo! Mas este quadro estava procurando mais sombrio, menos patina-ed, então eu escovado em um pouco de branco vidrado e alguns dos meus favoritos pintura de Ralph Lauren em Ouro Parlor. Só um pouquinho de cada, porém, de modo que o quadro ainda parecia mais velho.
Tudo pronto para o último passo: corte!
Usei estes passos para fazer correspondência tubulação fora do veludo mesmo. Eu acho que o cordão que usei foi 1/4 ". Nice e grossa por isso preenche a lacuna entre a espuma eo quadro com todos os grampos ea bagunça tecido / rebatidas.
Eu apenas usei minha cola favorito, Magnatac, a cola da tubulação no local. Use uma quantidade generosa, mas tome cuidado para não escorrer. É muito difícil conseguir esta cola fora de veludo especial.
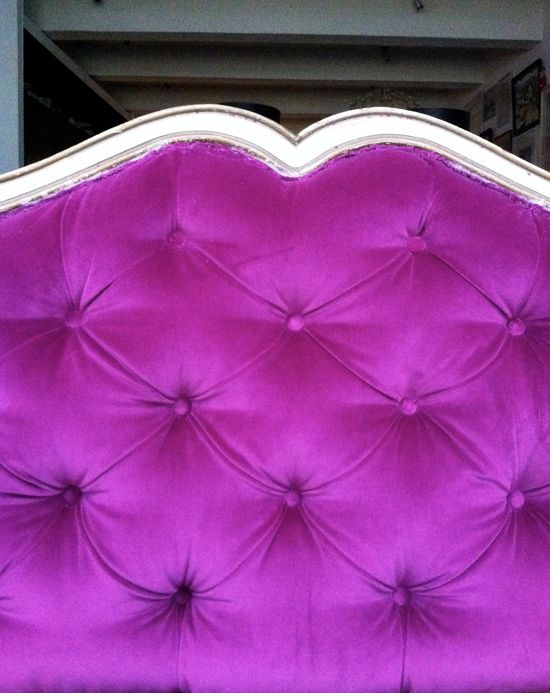
Tudo pronto! Eu sei que eu sempre digo isso, mas esse projeto foi tão rápido e fácil. Comecei o projeto ontem à noite logo após o jantar e foi feito após o debate republicano e dois episódios Walking Dead. Não é tão ruim!

Eu estava tão feliz por ser capaz de reutilizar essas cabeceiras antigas para obter a aparência exata que eu queria para o meu quarto das meninas! Eu amo a forma e isso me faz tão feliz de ter essas peças especiais em minha casa ao invés de um par de cabeceiras mais caros e genérica de um lugar como destino ou Urban Outfitters.

Simple Tufted Headboard

TOOLS & MATERIALS:
- 1/2 inch sheet of plywood cut to size (width of bed x desired height)
- 2 inch thick piece of dense foam cut to size of plywood
- Quilt batting (enough to wrap around plywood and foam)
- Desired fabric (enough to wrap around plywood, foam and quilt batting - fabric with a bit of sheen looks best, but has to be thick/strong enough to handle the upholstering process)
- 1x6 piece of lumber (at least 6 feet long)
- 2 inch long wood screws
- 2 inch long anchoring wood nails
- Staple gun and staples
- Measuring tape / ruler
- 4, 1/4 inch thick by 2 inch long bolts with wing-nuts
- Fabric scissors
- Fabric covered button kit and buttons
- Drill
- Screwdriver
- Hammer
- Nail punch
- Fabric marking pen
PROCEDURE:
Step 1: Cut quilt batting to be about six inches longer on all sides than your cut plywood. Lay out quilt batting on a clean, flat surface (probably floor). Place foam in center of quilt batting, place plywood on top of foam. Ensure everything's properly aligned, then firmly pull quilt batting around to the back of the plywood and tack in place with a staple gun around all edges.


*Tip*
To avoid extra bunchiness around the corners, cut a square out of the quilt batting at each of the corners (an inch or so from the plywood) before folding the corners in and tacking in place.


When finished, foam should be securely fastened to the plywood by the quilt-batting:

Step 2: Cut fabric to size (larger than your piece of quilt batting by about an inch or so), iron, and place on a clean flat surface (probably floor), right side down. Place padded plywood in center of fabric, padded side down. As with the quilt batting, cut out corners and firmly pull fabric around to the back of the plywood and secure entire length of edges with staple gun. Carefully fold in and tack corners as neatly as possible.


You really want to pull this as tightly as you can, so that the right-side surface of the headboard will be as smooth and taunt as possible:

Step 3: Figure out the desired spacing of your tufts by dividing the length and width of your headboard with the number of tufts you wish to have. Make sure you have it measured correctly so that tufted pattern will be equally distributed across the headboard. Configure your tufted pattern (should look like a 4 point diamond) on paper, and then carefully measure and mark pattern onto the right side of your headboard.
*Tip*
Take your time with this - make your mistakes on paper, and don't mark fabric until you are positive about what you need to do.


Step 4: Beginning with the middle row working out, place an anchoring nail at each marked point, and secure nail to plywood with hammer, sink in with a nail punch - be careful not to sink the nail in too far, or it will go through the plywood.


Step 5: Cover enough buttons of desired size with fabric to cover each nail-head in each tuft. Secure buttons to nail heads in tufts with a strong adhesive.

 | ||
| My first go with this I attempted to use hot-glue because it sets quickly, but I would probably reccommend something stronger. |
To extend the life and look of your headboard you may want at this point to treat it with Scotch Guard or another fabric protectant. Test on a sample of fabric before hand, and follow the instructions on the can.
Step 6: Cut 1x6 piece of lumber into 2 lengths of desired height for headboard (about 3ft high). Measure and mark where to drill appropriate 1/4" holes which will be used with bolts and wing nuts to secure head-board to bed-rail. Drill holes.
Step 7: Measure and mark where the top of the 1x6 length will be fastened to the headboard. Drill about 6 holes. Place 1x6 lengths on either side of the head board (according to measurments in order to make it fit with your bed-rail) and secure tops to back of headboard with wood screws where you drilled your 6 holes.
Step 8: Position head-board on bed, and tightly secure bottom of 1x6s to bed-rail with 1/4" bolts and wing nuts where your 1/4" holes are drilled. Enjoy!

Diamond Tufted Headboard


Here’s how I made mine:


You gonna make one?
I priced these online and they range from $500-$1200. I tallied our bill at about $100 plus some elbow grease…

But, we get to say… “We made it” & That makes it all worth it!
board. I like them in just about any shape and size. I’m just a sucker for diamond tufting.
 via The Paris Apartment, queen size $2200
But that deep tufting can be quite intimidating for some DIYers. But it shouldn’t be! Once you learn the process, you’ll wonder who in their right mind would ever pay such an extravagant price for a headboard. So let me show you how to save a small fortune.
First of all, you’ll need to determine the size of your headboard. The one I made for Gwen was a king size, so I made it 80″ wide x 34″ high. This allowed for a couple of inches to tuck behind the mattress at the bottom.
Once you’ve determined the finished size you want, go to Home Depot or Lowe’s and purchase a piece of 1/2″ MDF, and have them cut it to size for you.
You’ll also need:
- a bowl or small plate (optional);
- a Sharpie marker;
- a jigsaw (optional);
- an electric meat carving knife;
- a tape measure;
- a yard stick or other long straight edge for marking lines;
- staple gun and staples;
- your choice of fabric, large enough to cover the headboard size, plus about 18 inches on each side;
- 2″ foam, large enough to cover the MDF (this can be pieced together, if necessary);
- hi-loft polyester batting, enough for at least two layers to cover the MDF;
- adhesive for the foam (I prefer spray adhesive, although the fumes are quite noxious, so it has to be used outside, or you need to wear a protective mask);
- buttons…lots and lots of buttons (Gwen’s king size headboard required 57 buttons, and I used half ball cover buttons and covered them in the same fabric as the headboard. It’s a pain, but just go ahead and prepare these in advance, according to the instructions on the package.)
- one package of thin nylon or polyester upholstery/roman shade cord (can be found in the upholstery section at JoAnn Fabrics or other fabric stores);
- a large-eye upholstery or embroidery needle; and
- an electric drill with 3/8″ drill bit.
Don’t be frightened by the list! I promise…you can do this!!
To start, you will need to place your MDF on some support where both the top and the bottom can be accessed. Workhorses would be preferable. I used two chairs.

This step is optional: On the two top corners of the headboard, use a small bowl or plate as a template to round the corners.

Use a jigsaw to trim along the pencil mark to create rounded corners. Remove rough edges with sandpaper.

Now adhere the 2″ foam to the MDF using your choice of adhesive. I prefer spray adhesive, but if you use it indoors, be sure that you use a protective mask, and that all furry and feathered creatures are in another room protected from the fumes.

You may need to piece the foam to cover the entire piece of MDF. That’s not a problem at all. Just be sure to get the pieces butted against each other as smoothly and evenly as possible. Trim any excess foam with your electric meat carving knife.

Now we need to mark where our buttons will go:
Starting from the top of the headboard, place a mark at 8″, 16″, and 24″. Do this in several places so that you can use those marks as guides to draw horizontal lines. Then use your yardstick or straight edge to create horizontal straight lines all the way across the width of the headboard.

Find the center of the headboard, and place a mark at the center of each horizontal line. Use your tape measure, and beginning from the center marks, place a mark every 8 inches.

Now use your straight edge, and place diagonally between the marks you just made at 8″ intervals. This will show you where the buttons need to be placed on the diagonal.

Once you’ve got the whole headboard marked, it should look something like this. The top of the headboard is the long edge on the right side of the picture.

Next, use your drill to drill a hole through the foam and the MDF. Warning!! DO NOT go slowly on this. If you begin to drill slowly, the drill bit will grab the foam and rip it to shreds. You want to place the drill bit on the button mark, press down all the way so that you can feel the MDF, and then at FULL SPEED, drill very quickly through the foam and the MDF.

This next step is the one I dread the most, but it’s necessary. Professionals have a nifty little tool they use for this, but since I’m not a professional upholsterer, I have to make do with substitutes.
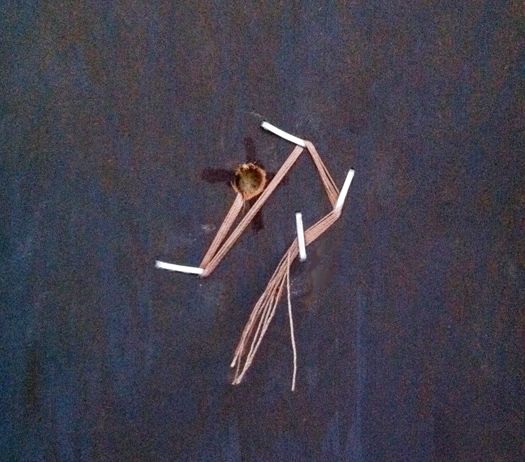
The goal here is to make holes in the foam for every single button that’s large enough for the button to rest at the bottom of the hole. Make sense? In order to do this, I use a combo of this little “tool” and my fingers to pinch out the extra foam. This tool is nothing more than two different pieces I found in the plumbing section at Home Depot. I place the pipe onto the button hole area, and begin twisting.

This is the least fun, the messiest, and potentially the most frustrating part of the whole process, but when it’s finished and the mess is cleaned up, it should look like this…

Now you’re ready for batting. I always use two layers of hi-loft batting (it’ll say hi-loft on the package). The more layers you use, the deeper the tufting will appear…but of course, the more you use, the more your project will cost, and this stuff ain’t cheap!!

Then spread out your fabric on top of the batting. Be sure that the fabric is centered, and there’s plenty of extra on all four sides.
To begin the tufting, you’ll start in the center of the headboard, working your way down on the main lines you drew at 8″, 16″, and 24″. As you work from one button to the next, be sure that the fabric is not pulled too tight. If you pull it too tight, you’ll lose the look of the deep tufting.
If you need guidance on how to string the buttons, and how to secure them on the back with your staple gun, you can refer to step #23 through step #25 of this upholstered headboard DIY for details.

Continue working across the horizontal lines with the buttons. It should look something like this…

After you finish all of the buttons on the horizontal lines, you’ll start on the diagonals. This is where the magic happens! When you press down on the diagonal, the tufts and folds should pretty much form by themselves. You may want to work with them a bit to create neater and cleaner folds, but you shouldn’t have to do too much.

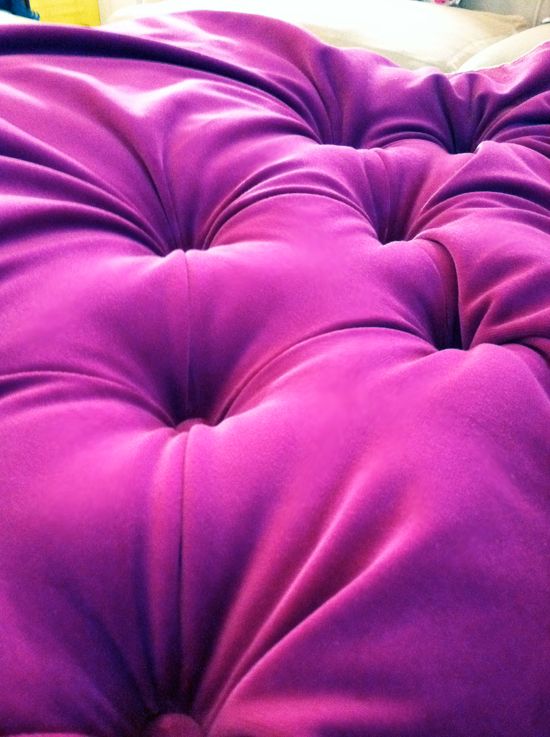
Once you’ve finished all of the diagonals, your headboard really begins to look like something quite special!!

The only thing left to do to finish the front is to secure the edges of the fabric and batting. Begin at one of the buttons, and create a nice, neat fold. Wrap around to the back and secure with your staple gun. You will do this around the entire headboard, creating a fold from each button to take up the slack in the fabric.

Once you’ve made it all the way around, the front of your headboard is finished!!

The back of your headboard will look like this. Pretty, huh?

The last thing left to do is to clean up the edges on the back. You’ll have extra batting and fabric, so add a few more staples all the way around, and trim off the extra fabric and batting.

It doesn’t have to look perfect, or even pretty, but you do want it to be flat so that your headboard can rest flat against the wall. Also, give all of your staples one last inspection, and hammer in any that aren’t all the way in.

And you’re done! Now step back and admire your handiwork.

Now don’t forget…if you try this project, I’d love to see your results!!! Also, once you understand the process, you can easily modify the plans the create any shape you want. If you want a curvy headboard, like the one in the first picture, then start by drawing your shape, cut it out with your jigsaw, glue the foam and trim to the shape using an electric meat knife, and then start at the center line to mark your buttons. The process is the same.
Have fun!! Get creative!!
Edit: Here is a photo of this headboard in the room for which it was created…

Want to see the whole “before and after” of this bedroom?Click here!


Jonathan Adler and Restoration Hardware both have headboards that are quite similar.... Would be delighted. Let me know if you want me to quote one for you. Jerry... You could make some money making a bunch for people like me!... be anice approach to any shape headboard; I would follow the curve of theheadboard in placing the medallions. They are very light too, can be painted, etc. Also, it eliminates the worry about a heavy object falling on my head. Currently above the bed, I have a beautiful picture but the frame... it's making. Better to place a pair of paintings or mirrors above the nightstands that are flanking the bed.... I've seen similar beds with a row of same-size pictures above, but the inside two raised and the outside two slightly lower to follow the line of the bed. Have also seen similar framing...
· This photo was added to 1365 ideabooks
· Recently added by g1ss3ll3, who said "Materbedroom"


Custom upholstered panels create a dramatic headboard in the Master Bedroom of... a home at Lake Martin, near Alexander City, Alabama.... Is it attached to the wall ?... this headboard is 4 custom upholstered panels we had made for this project... tufted headboard...seems like I could make this...... Four panel headboard, maybe diff color boxes scattered... Custom upholstered panels create a dramatic headboard in the Master Bedroom of a home at Lake Martin, near Alexander City, Alabama.... Tall homemade headboard, get pillows to match... pillows. Still calming but more pop than our current all white. it feels 'easy' /thrown together vs forced. Livable vs a museum accessorized bedroom....
· This photo was added to 9036 ideabooks
· Recently added by magraphe, who said "le mélange des styles"

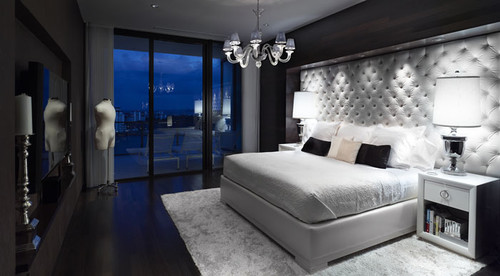
Valspar's Woodlawn Dewkist is a similar color.... How do you feel about this bed by Usona. It is available in white, and the tufting is in a diamond pattern. http://www.houzz.com/photos/33003/Thurman... Thank You. But the headboardshown in Houzz is a diamond shape and the one on the link sent to me is asquare shape. Where can I purchase the one that you show on your website?. Thank you.... Headboard and colors, love. I would add a pop of an accent color either with throw pillows or blankets... all is soft till you get to the lights... I like the contrast on the headboard... Whera can I purchase the headboard?.... Hi marianela! I designed this headboard and it's available through my company Pulp Design... & guidance to achieve this look shoot us an email: beth@pulpdesignstudios.com...
· This photo was added to 15873 ideabooks
· Recently added by ndachemabubakar, who said "Wow"

so right, the light would still show through anything I put over it. I will google a"how to" make a free standing upholstered headboard. You have so much wisdom and great ideas....thank you~ I have been so overwhelmed with this window and now I have a little more peace!!... master suite that has a very oddly placed window in the center of the wall with two double windows on either side. I will have to find a very creative way to hide this window so our bed will be centered on the wall. I was wondering if you would tell how you made thisheadboard and attached it to the... wall. Its a great idea...thank you for posting this picture!!... I think without the molding it looks more like an actual headboard just sitting there. Enjoy...
· This photo was added to 7363 ideabooks
· Recently added by mamedova, who said "Colors"


The client is such an energetic and charismatic person, and Larkin wanted to make sure that the home really reflected that. In the master bedroom, green and gold accents feel fresh but sophisticated, while a muted rug and wall color ground the rest of the room. Headboard... A metallic frame adds drama to this emerald tufted upholstery. This framed headboard option also works well with other metallic finishes and with wood... a room I'd love to stay in. My favourite green is on the headboard! But how cool is the metal edging! And OMG I just ADORE those pillows on the sofa. I need to add this pic to my 'pillows' ideabook too!... Bold headboard with bold color accents... looks like a hotel room? I like the loveseat in the space....
· This photo was added to 991 ideabooks
· Recently added by Josef Hudson, who said "headboard"


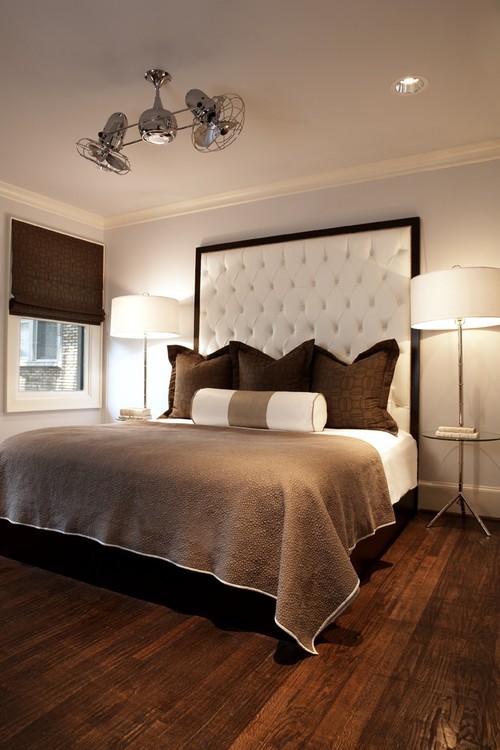
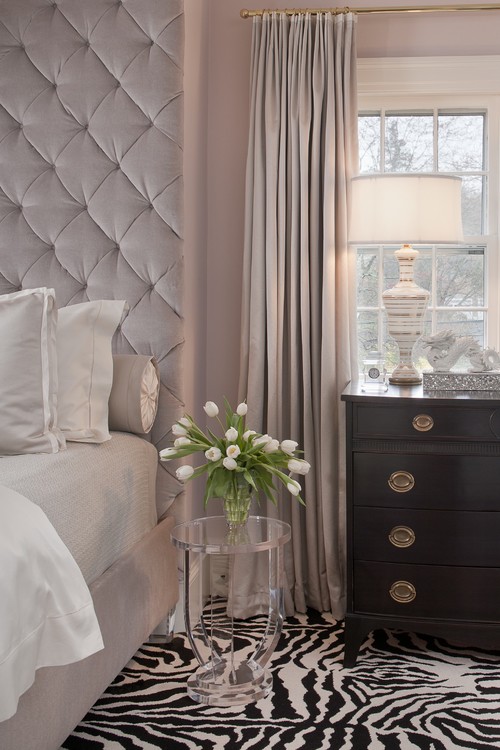
It is a grass cloth. I had the installer cut 18 x 18 inch squares and hang them in across hatch fashion to create the... The mirror next to the bed... tufted headboard with dark wood outline... It is a grass cloth. I had the installer cut 18 x 18 inch squares and hang them in a cross hatch fashion... Love the headboard, would love to make it... Headboard. Mirror on side wall like ours.... Grass cloth sqaures, large padded headboard and dark frame... The padded headboard and the zebra print pillows... Guest room to look like a hotel room... The wall color was a custom color to match the wallpaper behind the headboard.... Behind theheadboard is a wallpaper. It is really tricky to tell the color, because the lighting is artificial- very warm and cozy....
· This photo was added to 1077 ideabooks
· Recently added by Stephanie Fredrickson, who said "headboard"

Instead of a simple headboard, why not create an oversized tufted panel toground your bed? By laying a rug in a similar color an