Outro dia a gente falou sobre mini-salas de jantar que, além do pouco espaço, tinham em comum uma mesa dobrável,
lembra? Pois é, apesar desse tipo de móvel ser mais visto na cozinha, funciona super bem nas mini-salas de jantar. Mas olha, é preciso ser bacaninha, e de preferência não ter aquela cara de "móvel de cozinha".
O causo é que a gente sabe bem o quanto uma mesa que aumenta e diminui, de acordo com o que a gente precisa, pode ser útil nos apertamentos da vida - e já teve até tutorial
aqui no dcoracao.com.
Mas pra facilitar pra você, fomos em busca de algumas opções aqui no nosso mercadinho brazuca. A boa notícia? Por ser um móvel, digamos, menos nobre, o preço costuma ser camarada.
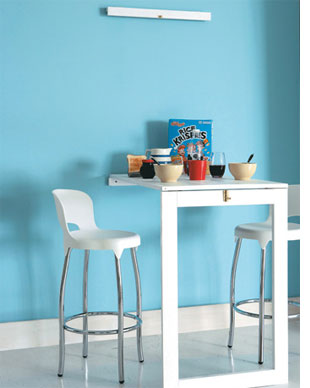
#mesa1 - redonda As redondas, dobram um dos lados para ficarem retinhas na parede. A da foto acima é das
Lojas KD e mesmo dobrada, recebe 3 pessoas.
#mesa2 - redonda Já esta vi na
Tok Stok é do esquema “metade ou o dobro”, sem contar que toda dobrada, pode ficar guardada no cantinho. Tem branca também.
#mesa3 - retangular Essa, da
Tok Stok vira aparador, e é branquinha, fácil de combinar.
#mesa4 - quadrada Aliás, branca é a cor mais comum, e quadrada é o
modelo mais comum. Fechada, tem espaço suficiente para uma ou duas pessoas e aberta, para quatro. A da foto acima esquerda (fechada e aberta) é das
Lojas KD.
#mesa5 - quadrada O modelo parecido, com os pés trabalhados, é da
Mobly.
Make a flip-up | flip-down table
Making use of a small space requires out-of-the-box thinking. Here's a project that makes smart use of space. Make this flip-up | flip-down table for a small townhouse or flat and simply flip-up the table when you don't need it.
Great idea for a temporary place to work on a laptop!
Even a beginner DIYer can make this table with a few basic tools and materials.
You will need:
Wood glue
Wood filler
8 x 8mm dowel pins
6 x 50mm butt hinges
Piano hinge 610mm length
Barrel bolt latch
65mm wood screws
Rust-Oleum chalkboard paint
Rust-Oleum 2x white - gloss
Drill/Driver + bits
Dowel centres
Wall plugs and screws
Foam roller
Paint tray
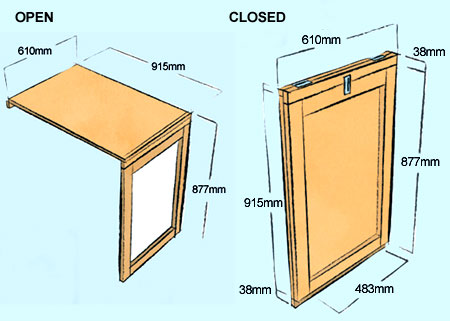
CUTTING LIST
| | 1 | 19mm | board |
610mm
|
915mm
| top |
| | 2 | 20mm | pine |
76mm
|
880mm
| leg sides |
| | 2 | 20mm | pine |
76mm
|
458mm
| leg top/bott |
| | 1 | 20mm | pine |
40mm
|
610mm
| lock frame |
| | 1 | 20mm | pine |
20mm
|
610mm
| wall support |
| | 1 | 20mm | pine |
20mm
|
610mm
| table support |
Here's how:
Step 1
Have your timber and board cut to size at your local
Builders Warehouse. For the top you can use 19mm plywood, 18mm PG Bison SupaWood or 20mm laminated pine shelving.
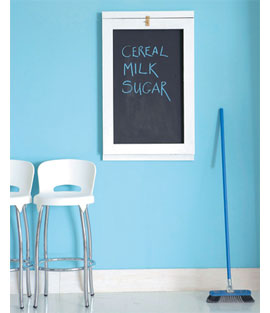
Consider painting the chalkboard on your tabletop before you assemble everything, that way you'll only have to do touchup painting later, but it’s easier to do the bulk of the work now rather than working around the other components later.
Paint the bottom with chalkboard paint and the top and edges with Rust-Oleum high-gloss enamel. With the high gloss, paint the pine you’ll be using for the leg, too. Take the pieces outside to paint.
Step 2
To make the leg unit, which does double duty as the chalkboard frame, clamp the boards to your work surface, then drill two 8mm holes to a depth half that of the 8mm dowels.
GOOD TO KNOW
Wrap a piece of masking tape around your drill bit so that you know how deep to drill.
Step 3
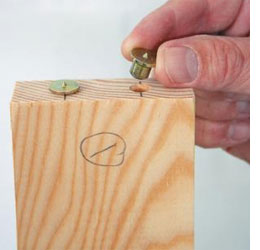
Place dowel centers in the holes and then press the edge of the long side members against the dowel centres to mark the exact location of those holes.
Use an 8mm wood bit to bore those holes, again to half the length of the dowels.
Step 4
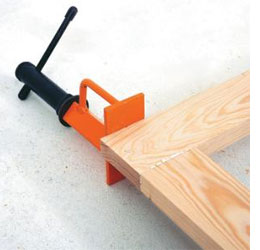
Apply wood glue to the dowel pins and boards, push in the dowel pins and clamp the frame together.
Step 5
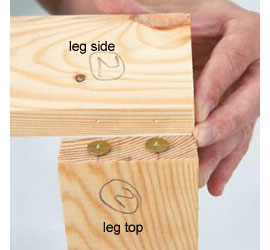
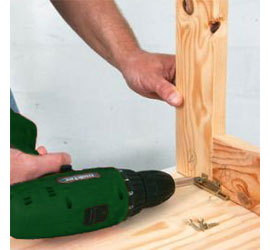
Once the glue has dried, attach the legs to the top using two butt hinges.
Screw one leaf of the hinge to the bottom of the tabletop, 19mm back from the end and the other leaf to the back edge of the leg.
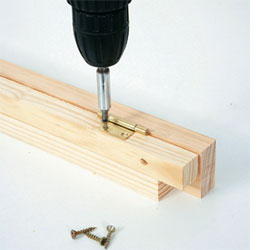
Attach the bottom wall support with plugs and screws and then attach the table section to the top of the wall support with a piano hinge.
Step 6
Build the upper lock bracket by securing the 20mm x 20mm wall support to the 40mm lock frame flap with two butt hinges.
Have a helper raise the table into the closed position while you mark the location of the top bracket.
Lower the table and secure the top bracket to the wall using plugs and screw.
Step 7
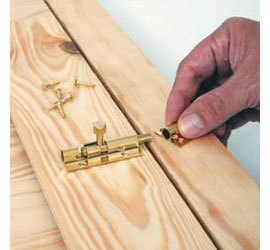
Raise the table top up and install the barrel bolt.
Finishing
Touch up paint as needed.
GOOD TO KNOW
To prevent the leg of your table from "kicking out" in the down position, install trunk lid supports on each side to lock the leg in place.